Previous Lesson: Lesson 3: Setting Up Our Computer
Learn about strings and variables in Python. We’ll be printing strings, we’ll assign values to variables, and finally, we’ll print these values.
Before starting this exercise, make sure that you’ve been on the previous lesson. If you’re all set, then let’s start with opening our Visual Studio Code:
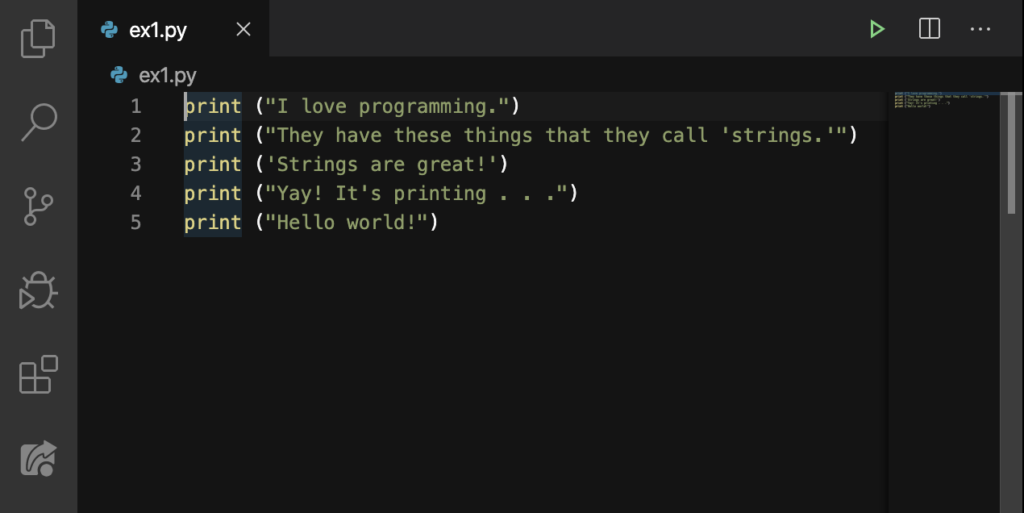
Alright! We’ll start with printing “strings.”
Printing strings
By the way, do you know what strings are? Of course you know them; they are materials consisting of threads of cotton, hemp, or other material twisted together to form a thin length.
But, technically speaking when around programmers, these are what we call strings:
- “I love programming.”
- “They have these things that they call ‘strings.’ ”
- ‘Strings are great!’
As you can see, strings have a pair of double-quotes (“”) or a pair of single-quotes (”). Just to remember things easily, if a word or phrase or sentence has a pair of double-quotes, or a pair of single-quotes, it’s considered as a string.
Right now, we’ll type the following strings on our editor. It’s important to type these exactly on your editor:
Ctrl + S or Command + S to save. Now let’s type ex1.py in the Terminal (if you’re using Windows). On Mac, type in python3 ex1.py like this:
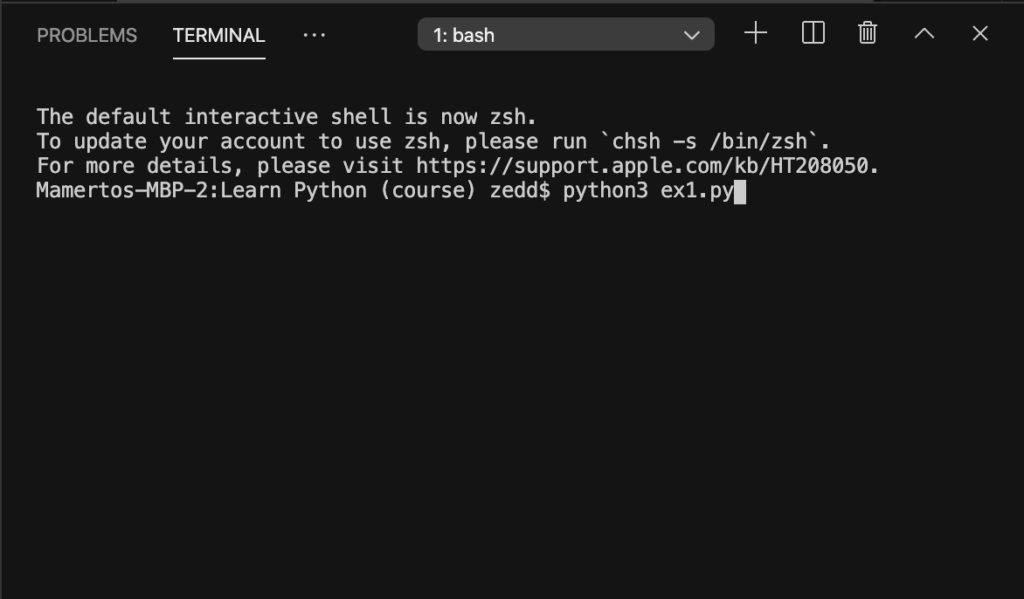
Note: I am using Mac. So if your Terminal doesn’t look like mine, you’re more likely using a different operating system like Windows.
Now press ENTER:
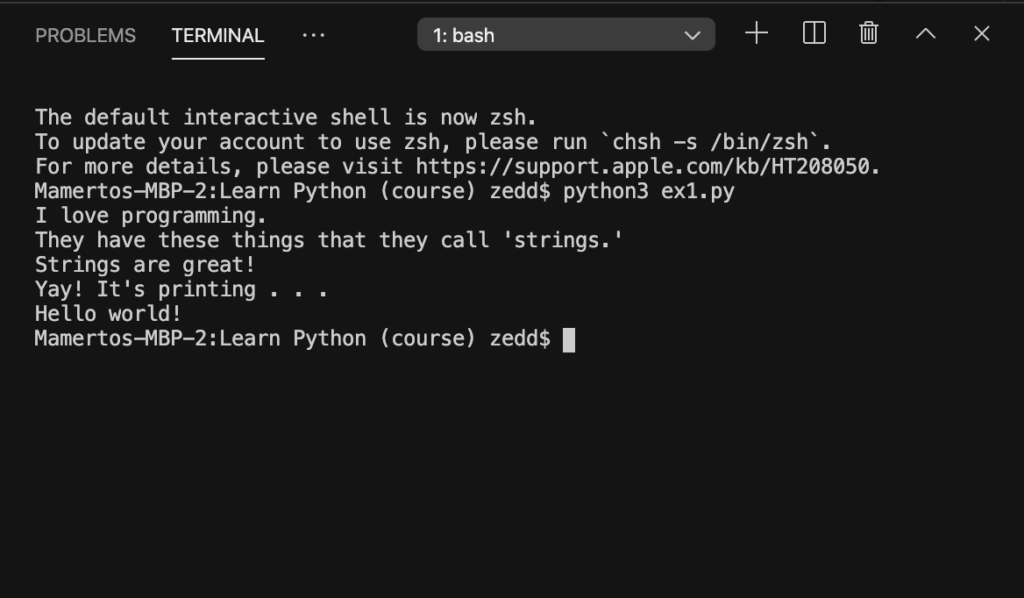
Make sure that you have this exact result on your Terminal. If not, double-check. If you see that it says about an error, you made a mistake, okay? That’s what we do, we check our code and we double-check and triple-check and so on. In short, we make sure that there are no “bugs” in our code. Always remember: The computer is never wrong.
After seeing the error in your code, you can run this again in your Terminal by typing in ex1.py once again.
Assigning variables
You may have already heard this on your Algebra class. Actually, they have the same concept: a variable has a value, when you assign something to it. Let’s make a new separate file for this one. This time, we’ll name it: ex2.py. Now you know how to do that, you’ll just have to hit that icon at the sidebar to create a new file.
After doing so, type the following in your editor. Again, make sure that you type the exact words and characters.
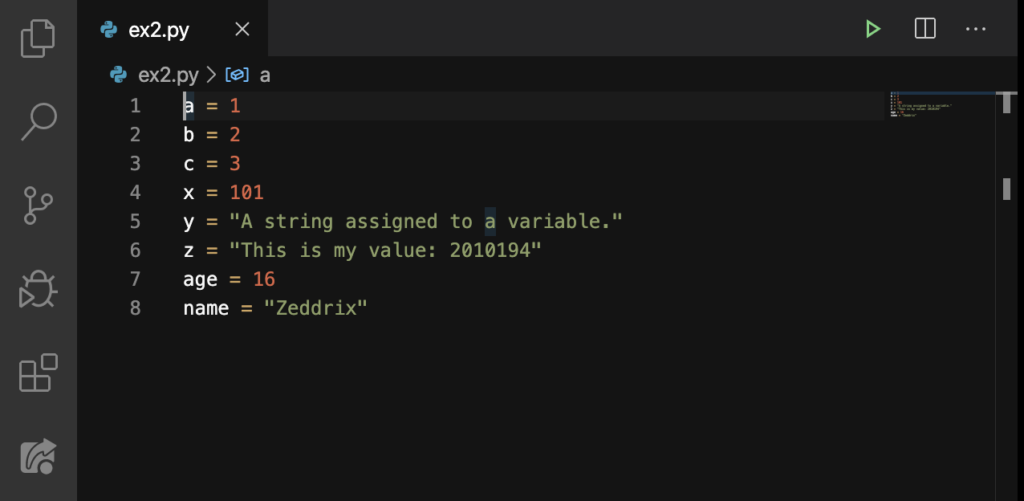
Well done! Do you know what you have just done? You have just assigned a value to multiple variables! That’s it! Simple isn’t it? Now, try making more of these as you want. As you have already noticed, you can assign an int (integer) or a str (string) to a variable. Ctrl + S or Command + S. Can you guess how we would run this code?
That’s right! We’ll type in ex2.py in Terminal and hit ENTER:

What just happened? Nothing happened actually. Which means that our code worked! You’ll see why and how it worked. Not now; later of course. There is just one little thing that we’ve forgot to do.
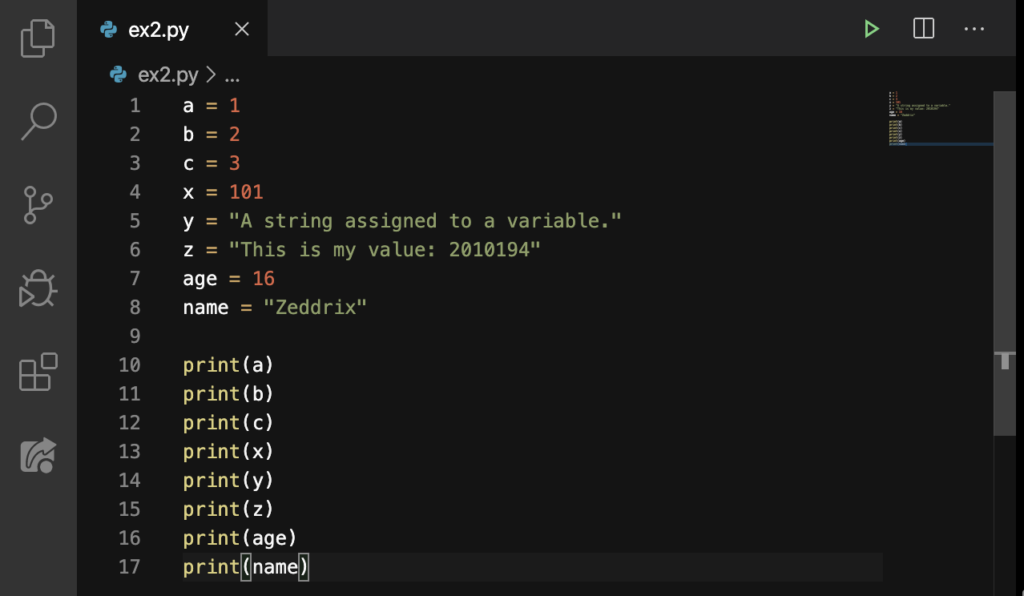
Printing values of variables
Ready to make things work? Then type these on your editor just below our variables:
For the last time, make sure that you’ve typed everything exactly. And, don’t forget saving these edits by hitting Ctrl + S or Command + S. Now let’s run this. As always, type the file name, which is ex2.py, on the Terminal. Then press ENTER.
Or, allow me to give you a good little tip. Once you’ve done a command on the Terminal, you can run it again without even typing a single letter. Wanna know how? Simple; just hit the UP ARROW (↑). So instead of typing ex2.py, or any filename over and over again just to run it over and over again, we can just press this key to help us with that. ENTER.
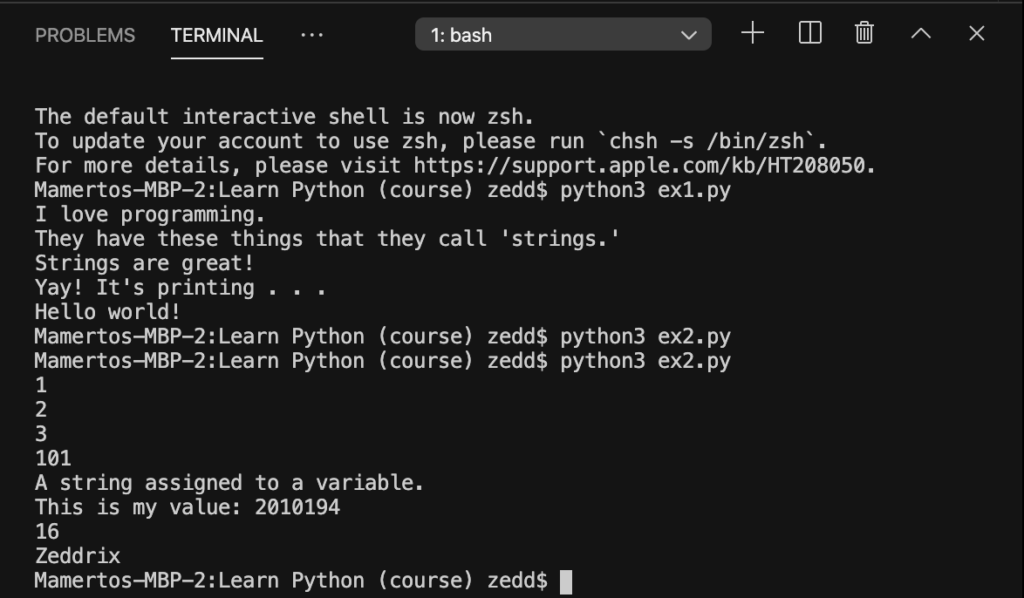
Yay! Nice work. Again, make sure that you have the same results (except if you’ve added some variables of your own) in your Terminal. However, when you make an error, it may look something like this:
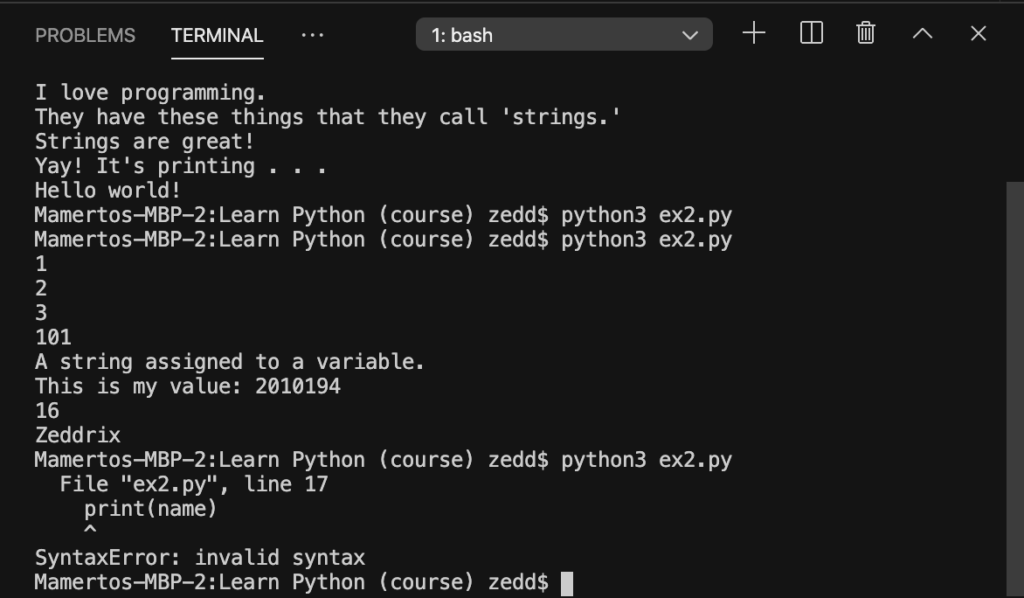
But don’t worry. This just means that you’ve typed something irrelevant or missed an important key or something. But here’s a tip that many programmers (in fact, all programmers) do: See whatever the Terminal tells about the whereabouts of the cause of error. But it’s still important not to depend on this one all the time because the error might be found before the line of error; or even after the line of error.
Great job! You now have some of the fundamentals of printing strings and variables in Python! Learn more on the next lesson!