Previous Lesson: Lesson 49: Using ‘For’ Loop to Show Our Blog Posts
In this lesson, you’ll learn how to give each blog posts their own URL. You’ll also learn about the blog_id and the 404 page.
Blog objects (?)
But, before we start doing all these, I just want to do something with these:

This is the Django admin page for our blog posts. I just can’t convince myself that these are not disturbing. Changing these to the appropriate blog titles is going to save our heads from pain. Why did I say so?
Think of it: The day comes that you already have hundreds of blog posts. But then as you were reading a blog post from the Blog page, you think that you needed to edit some major ideas there.
So you go back here to the Django admin page to look for that blog post. But all you see here will be the Blog object (?). Now how are you going to look for it? If you’re gonna find it manually, I’m pretty sure that would take just 10 years!
Fortunately, we have a way to fix this problem. So here on models.py:
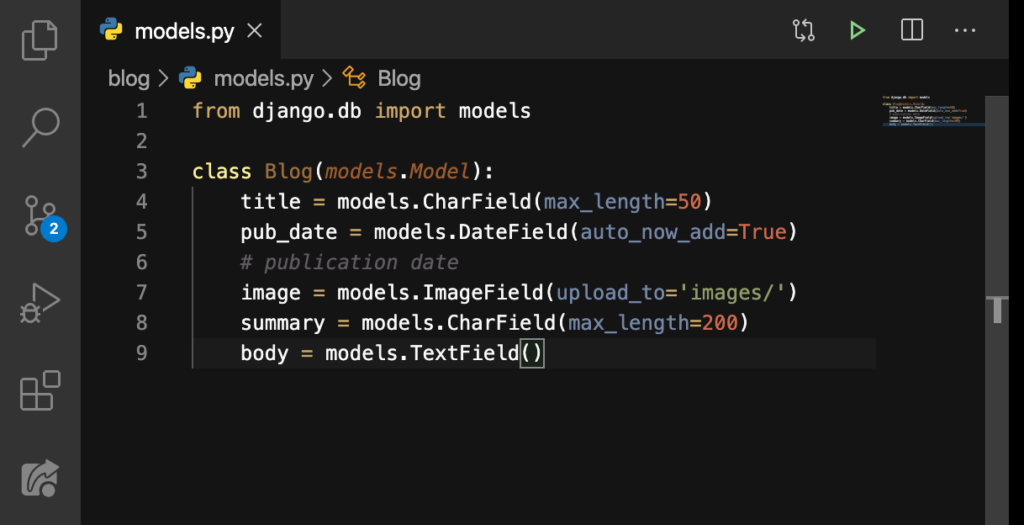
We’ll add this new function:

We used the __str__ to show the object names. Now let’s see:
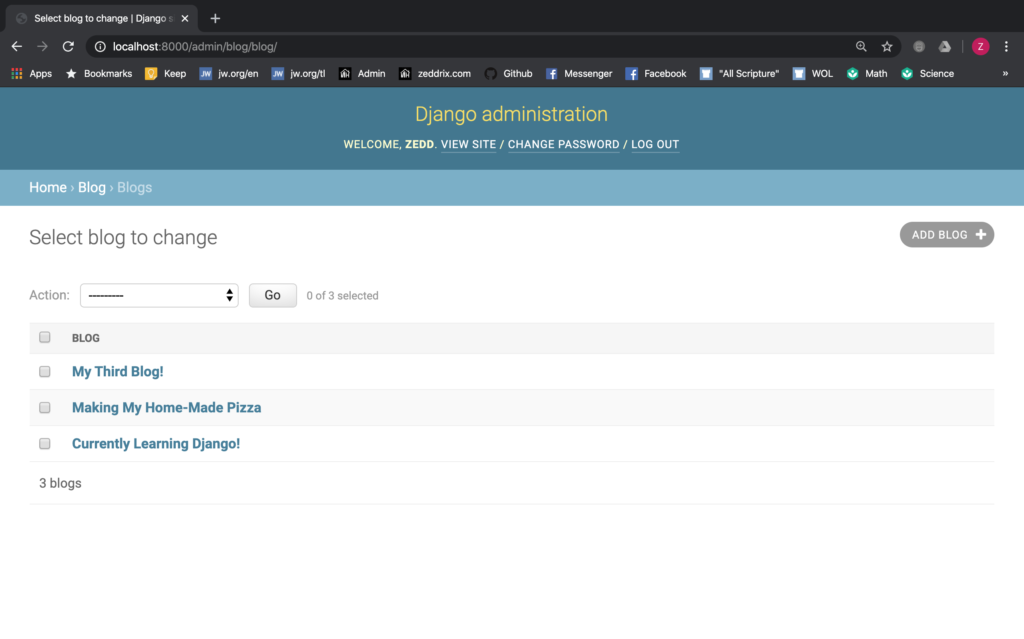
Nice! We can finally find and edit a blog post here with no difficulty now! Now, let’s get to work.
Planning
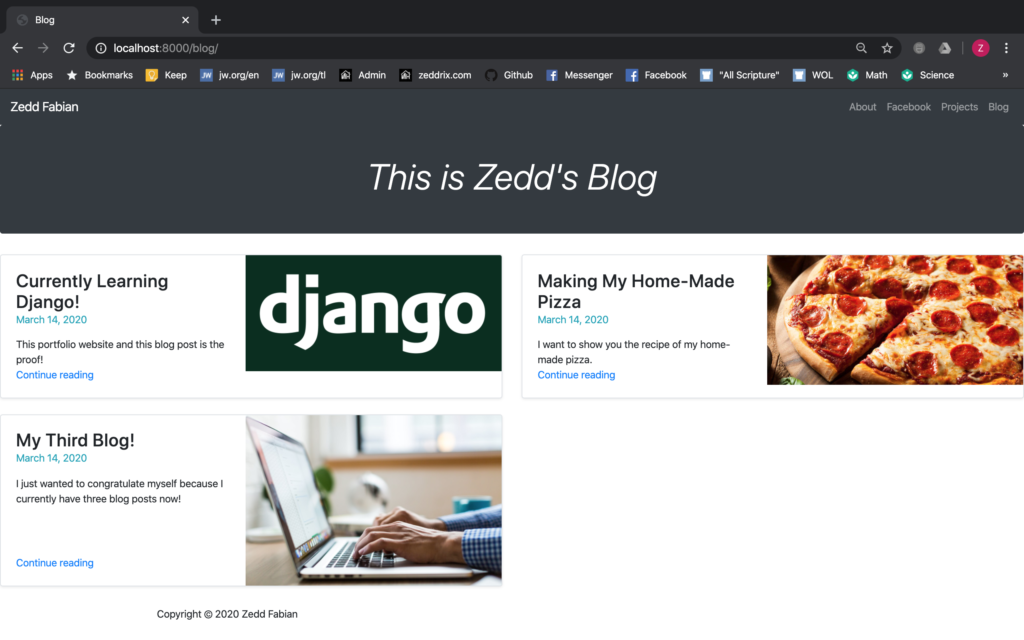
So again, here on our Blog page, we want to link this Continue reading to a blog post’s contents. Right now, if we click on that link, it will take us nowhere:
So here’s the plan:
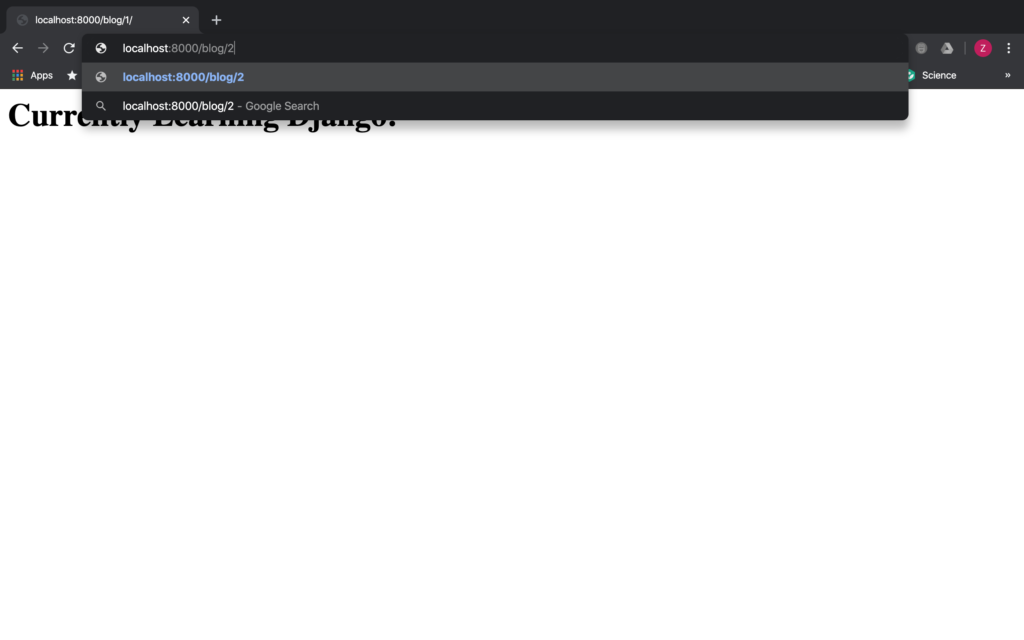
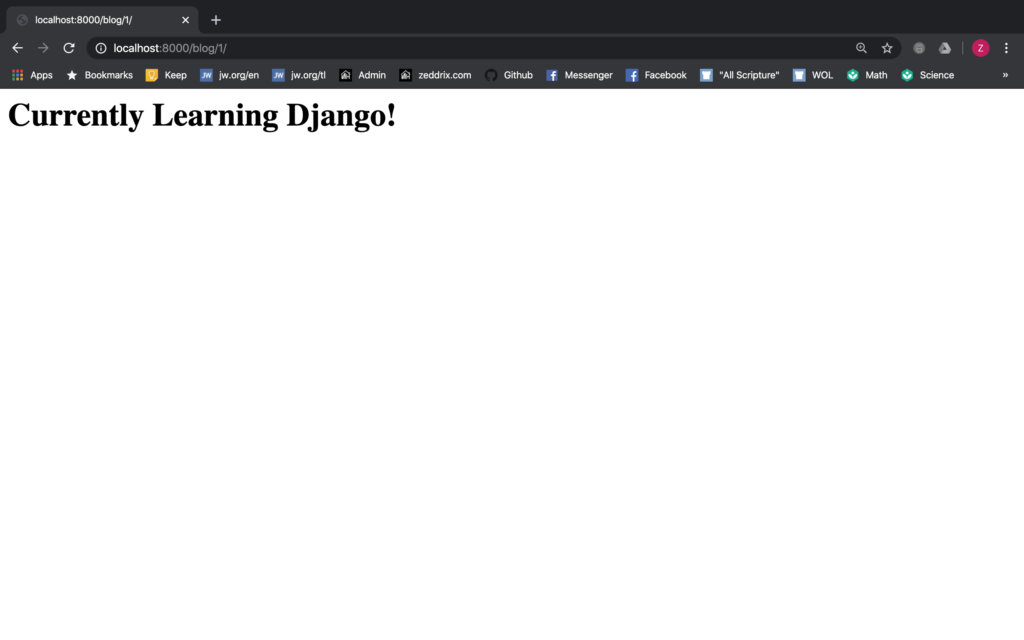
- When we say localhost:8000/blog/1, it should take us to the first blog post’s contents, which, in my case, the Currently Learning Django!
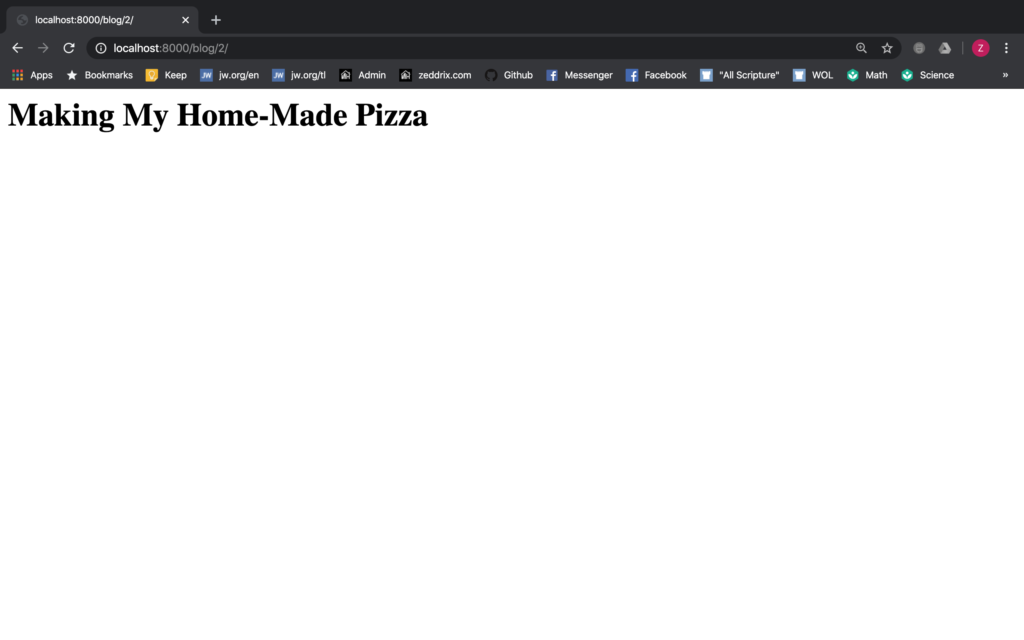
- Then when we say localhost:8000/blog/2, it should take us to the second blog post’s contents, which, in my case, the Making My Home-Made Pizza.
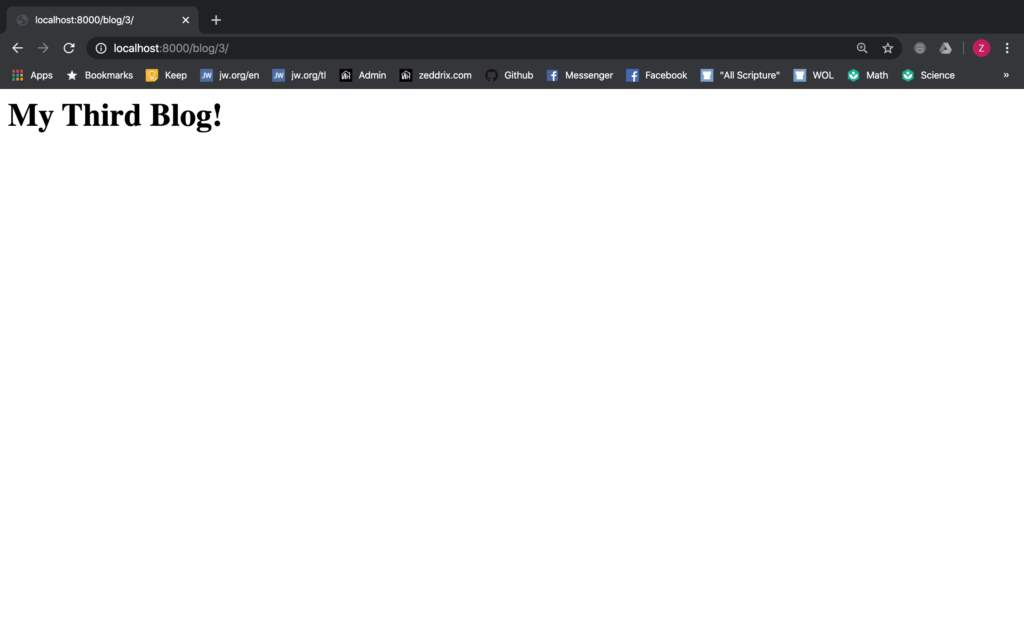
- Finally, when we enter localhost:8000/blog/3, it should take us to the third blog post’s contents, which, in my case, the My Third Blog!
- But! If we enter localhost:8000/blog/4, we should get nothing since we don’t have a fourth blog post. If entering this takes you to a blog post, except if you have a fourth blog post, well I don’t know what I’ll do with you anymore.
After keeping all our plans in mind, let’s now give these blog posts a URL and blog_id!
blog_id
Go to urls.py:
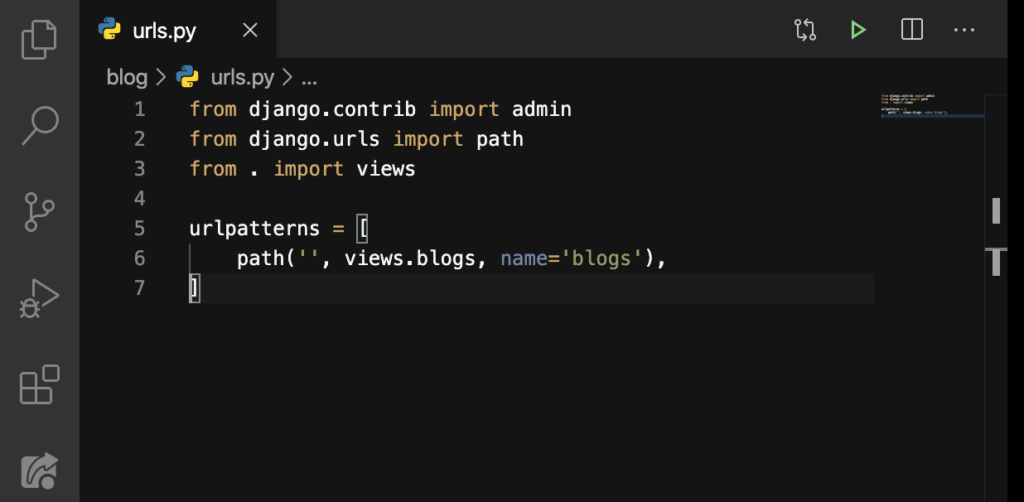
And say this:
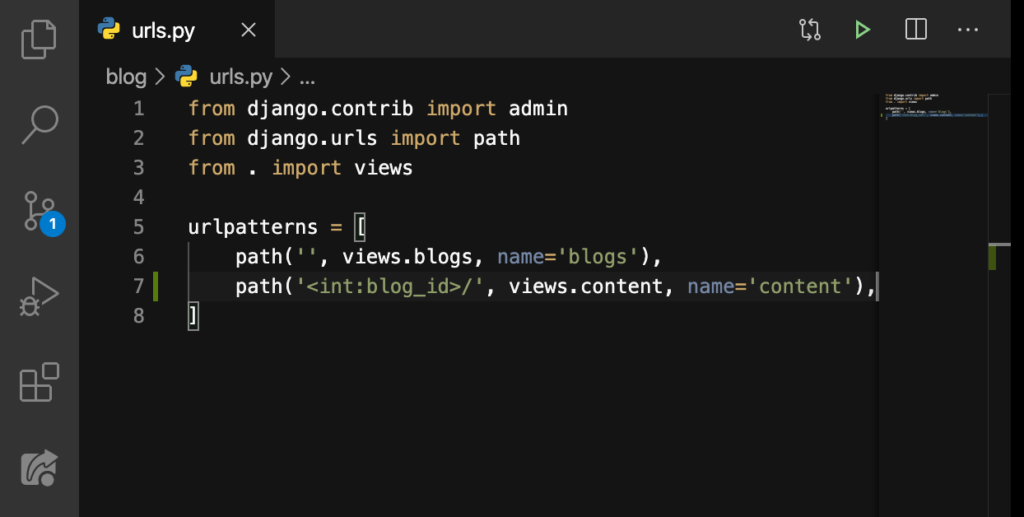
Let me explain what this‘<int:blog_id>/’ does. First, when someone types in the /1/ in the URL, this line of code will recognize that 1 is an int (integer). Because this is a int, Django will save it as a blog_id.
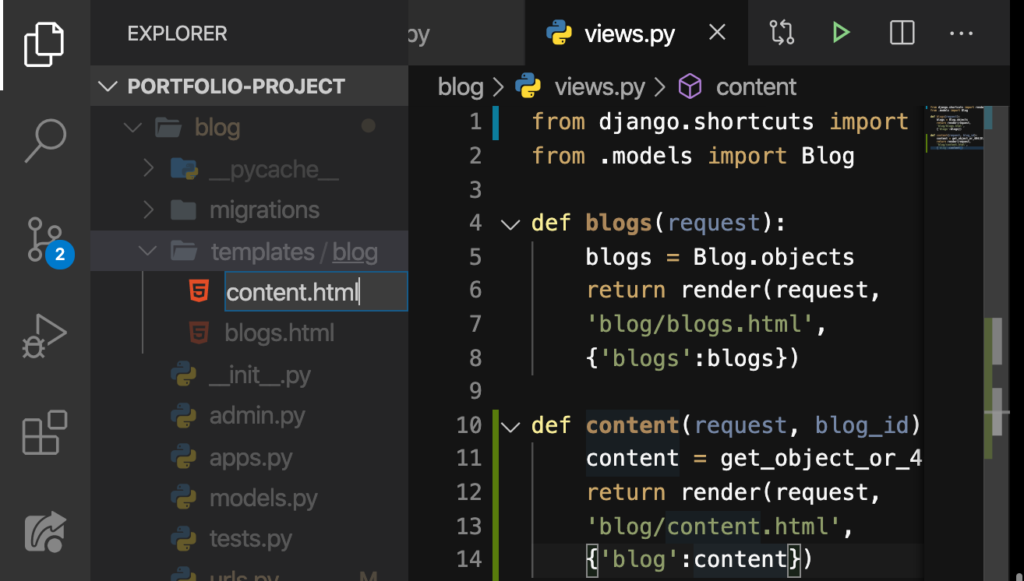
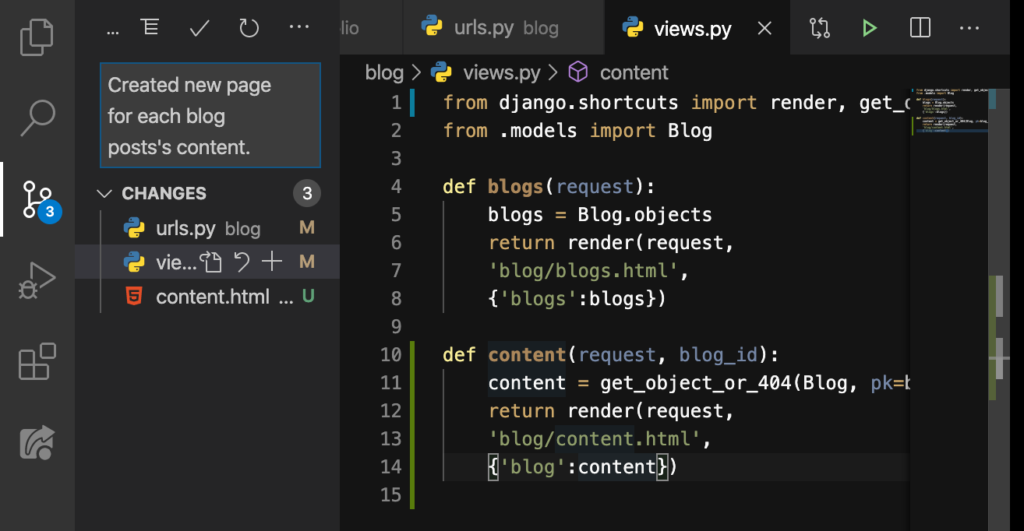
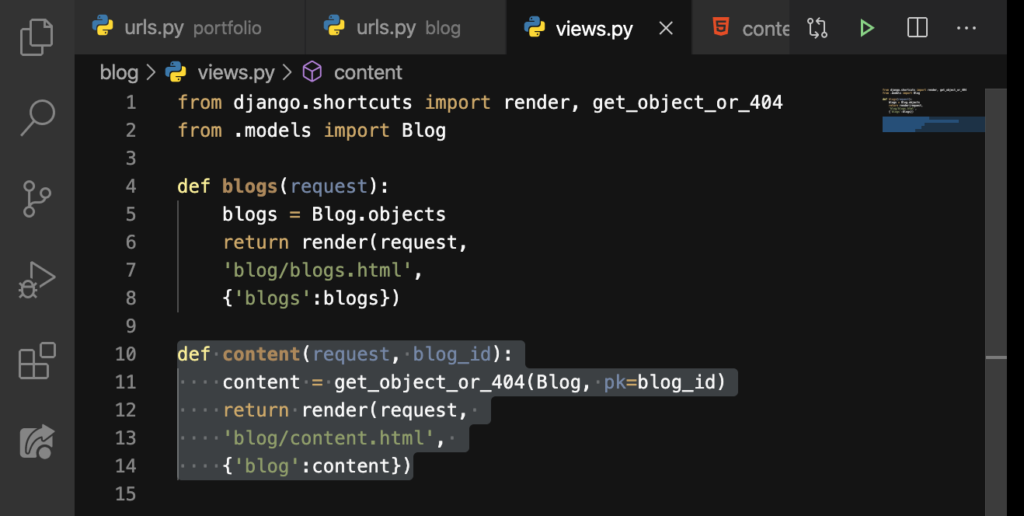
After that, the content function is called. We don’t have this inside our views.py yet so let’s make one:
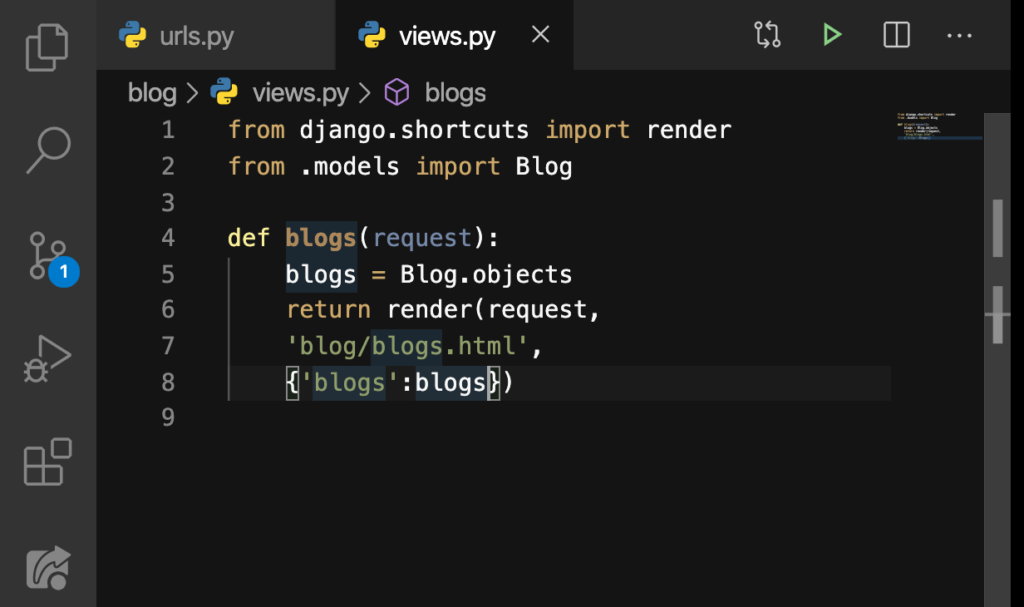
Do this:
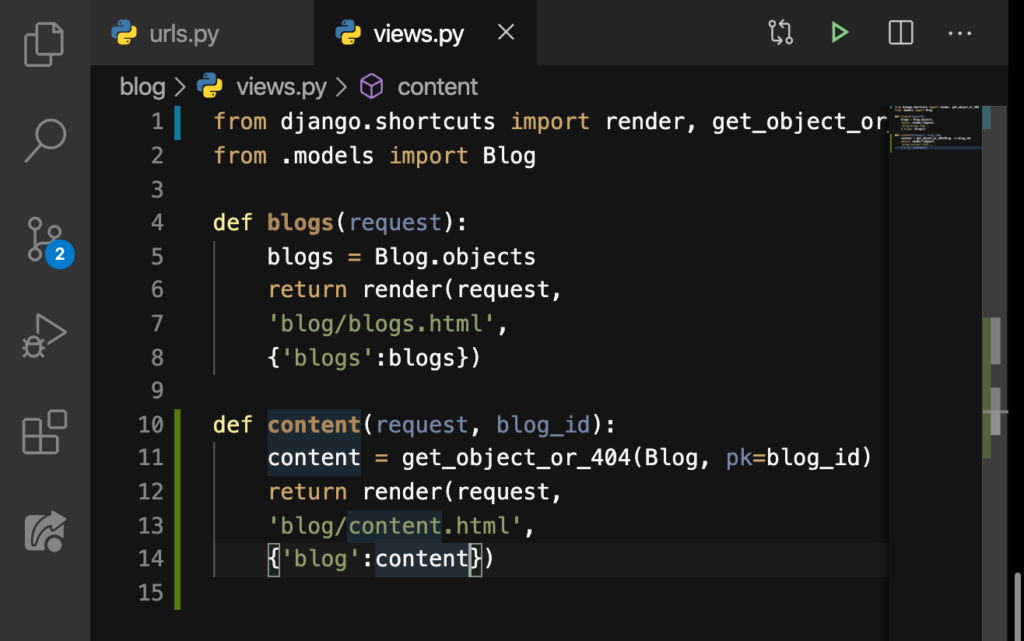
Notice that we have imported something on Line 1. I’m sorry that I didn’t get the whole line of code there. But that is get_object_or_404. How does this work?
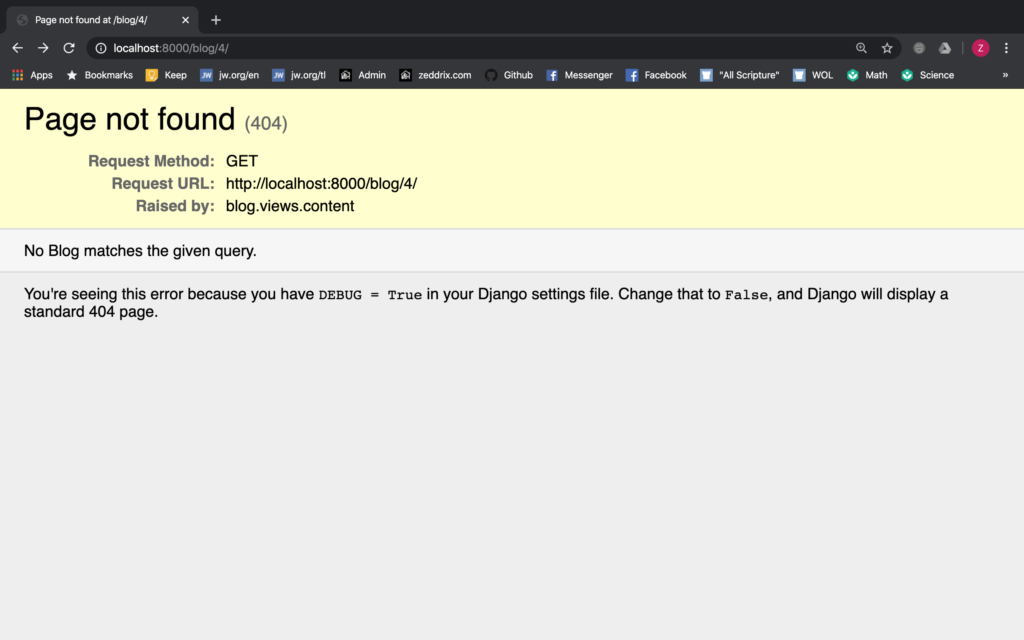
It will either get an object from the database, or spit back a 404 page saying that the page is not found. For example, if we type in localhost:8000/blog/4, knowing that I don’t have a fourth blog post, this will get displayed:
Back here on our views.py:
On Line 10 down to Line 14, we defined a new function called content with the parameters request and blog_id. Then on Line 11, we used that get_object_or_404, and then passed our model (Blog), and finally passed the pk or primary key (it’s how it looks it up at the database). All these actions were then assigned to the variable content.
Then on Line 12, we returned a render, request. On Line 13, we passed the HTML file, content.html that is inside our blog app. Finally on Line 14, we passed a dictionary.
content.html
Now let’s create this HTML file:
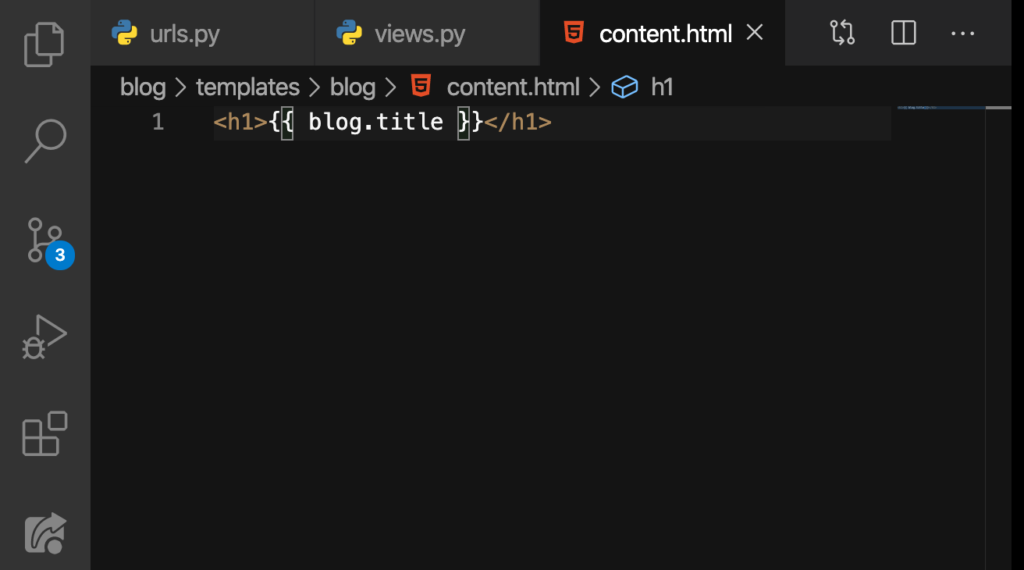
ENTER:
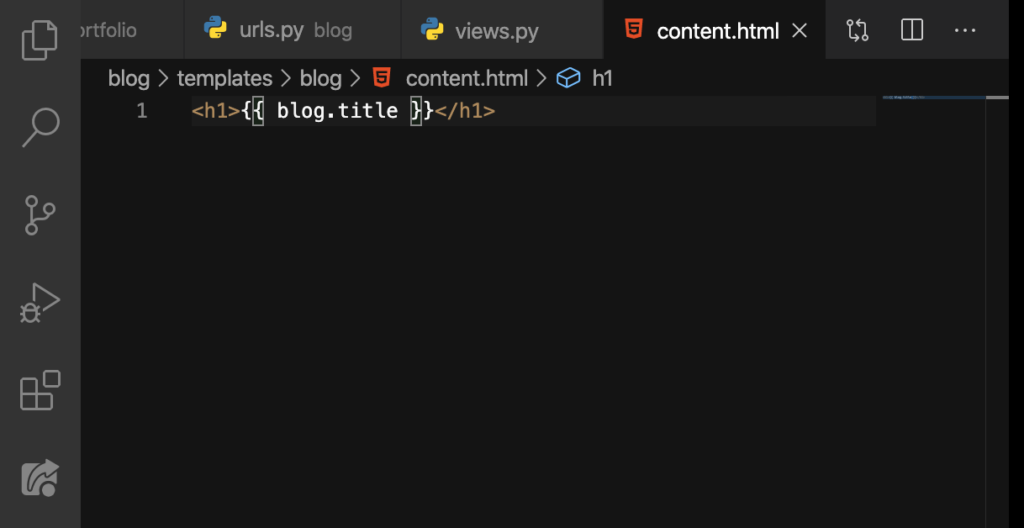
Nice. Just to know if this is working, let’s print out the title of our blog post by doing this:
Go to our website and search localhost:8000/blog/1:
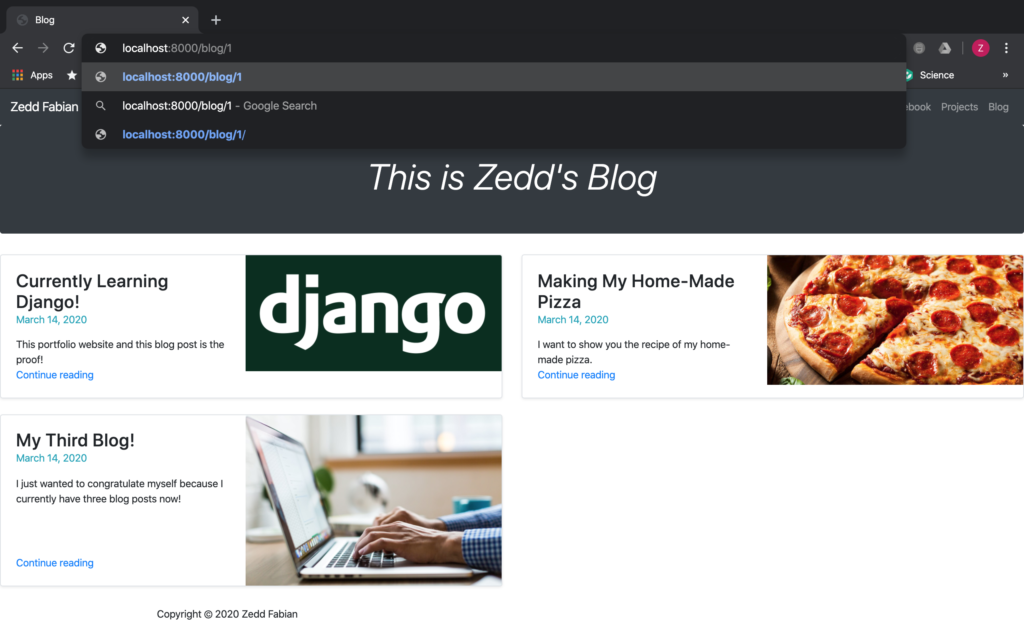
ENTER:

Epic! Now let’s try entering localhost:8000/blog/2:
ENTER:
Awesome! Lastly, enter localhost:8000/blog/3:
Nice. But if we enter localhost:8000/blog/4/:
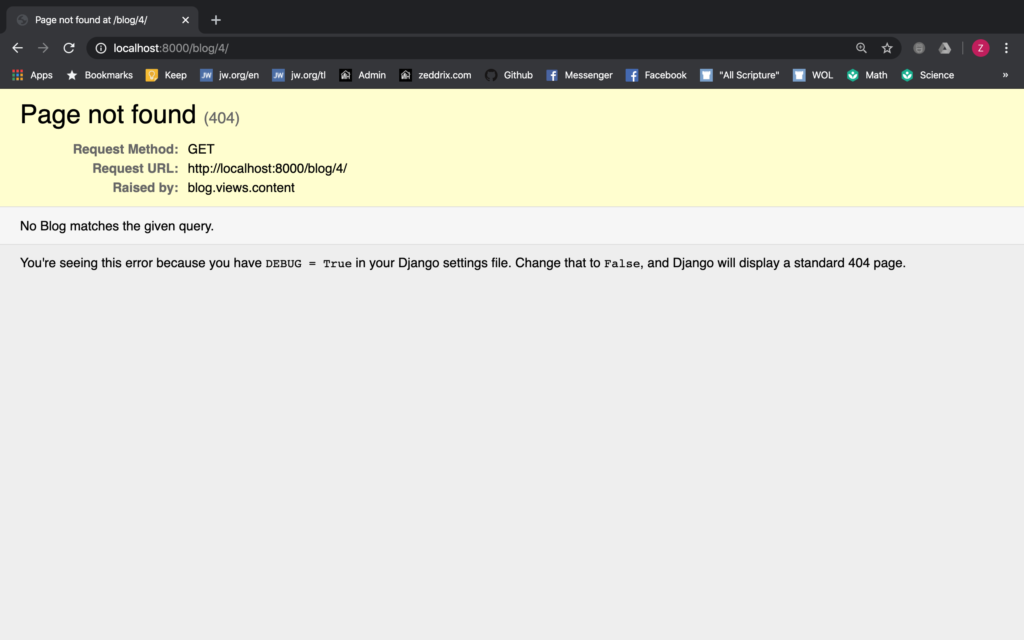
Note: This will only happen if you don’t have a fourth blog post. Before I tell you the flow of our code here, let’s commit these changes to GitHub first:
Good.
The flow of our code
When we enter localhost:8000/blog/1, that will first go here on our portfolio‘s urls.py:
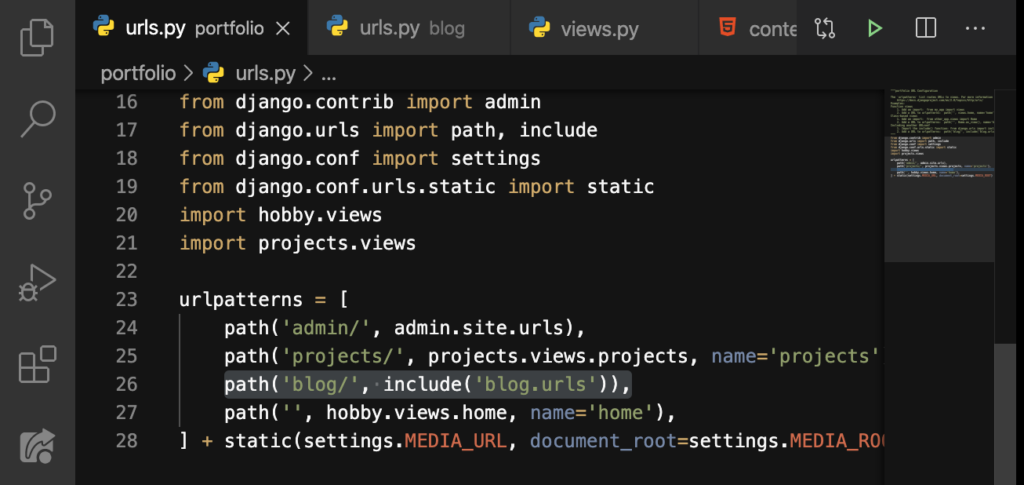
Now once it matches the blog/ here on Line 26, it will take us to urls.py of the blog app:
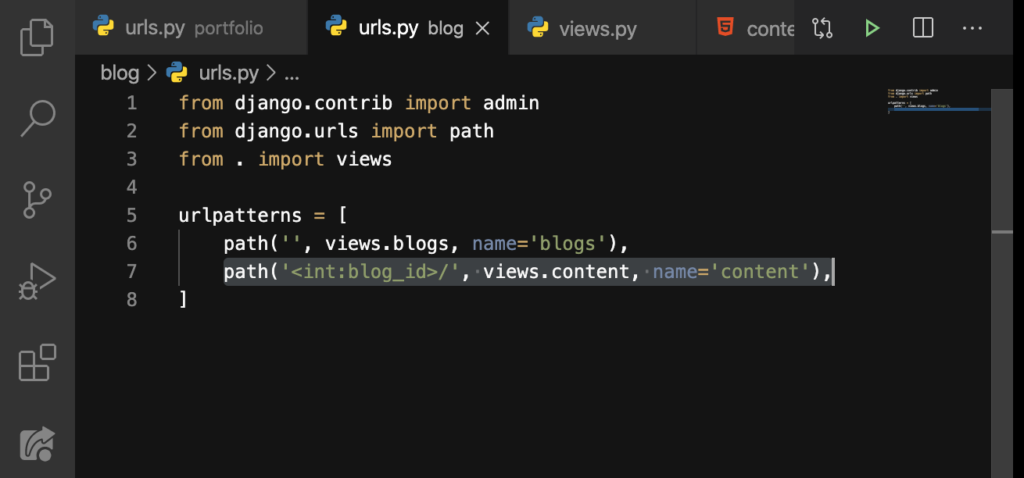
Now it realizes that there was a number or an int on the URL. So, it will save that int as the blog_id. Then it will call the content function, which we have defined here inside the views.py:
After looking for the blog_id from the database, it will return our HTML file, the content.html:
And finally, the contents of this blog post will display:
Mind-blown! You just learned how to give these blog posts a URL and their own blog_id’s. In the next lesson, we’ll add up our image on the homepage. And then we’ll also do the About button. See you there!